Inkpad Selection Tools
by Lindsay in Features
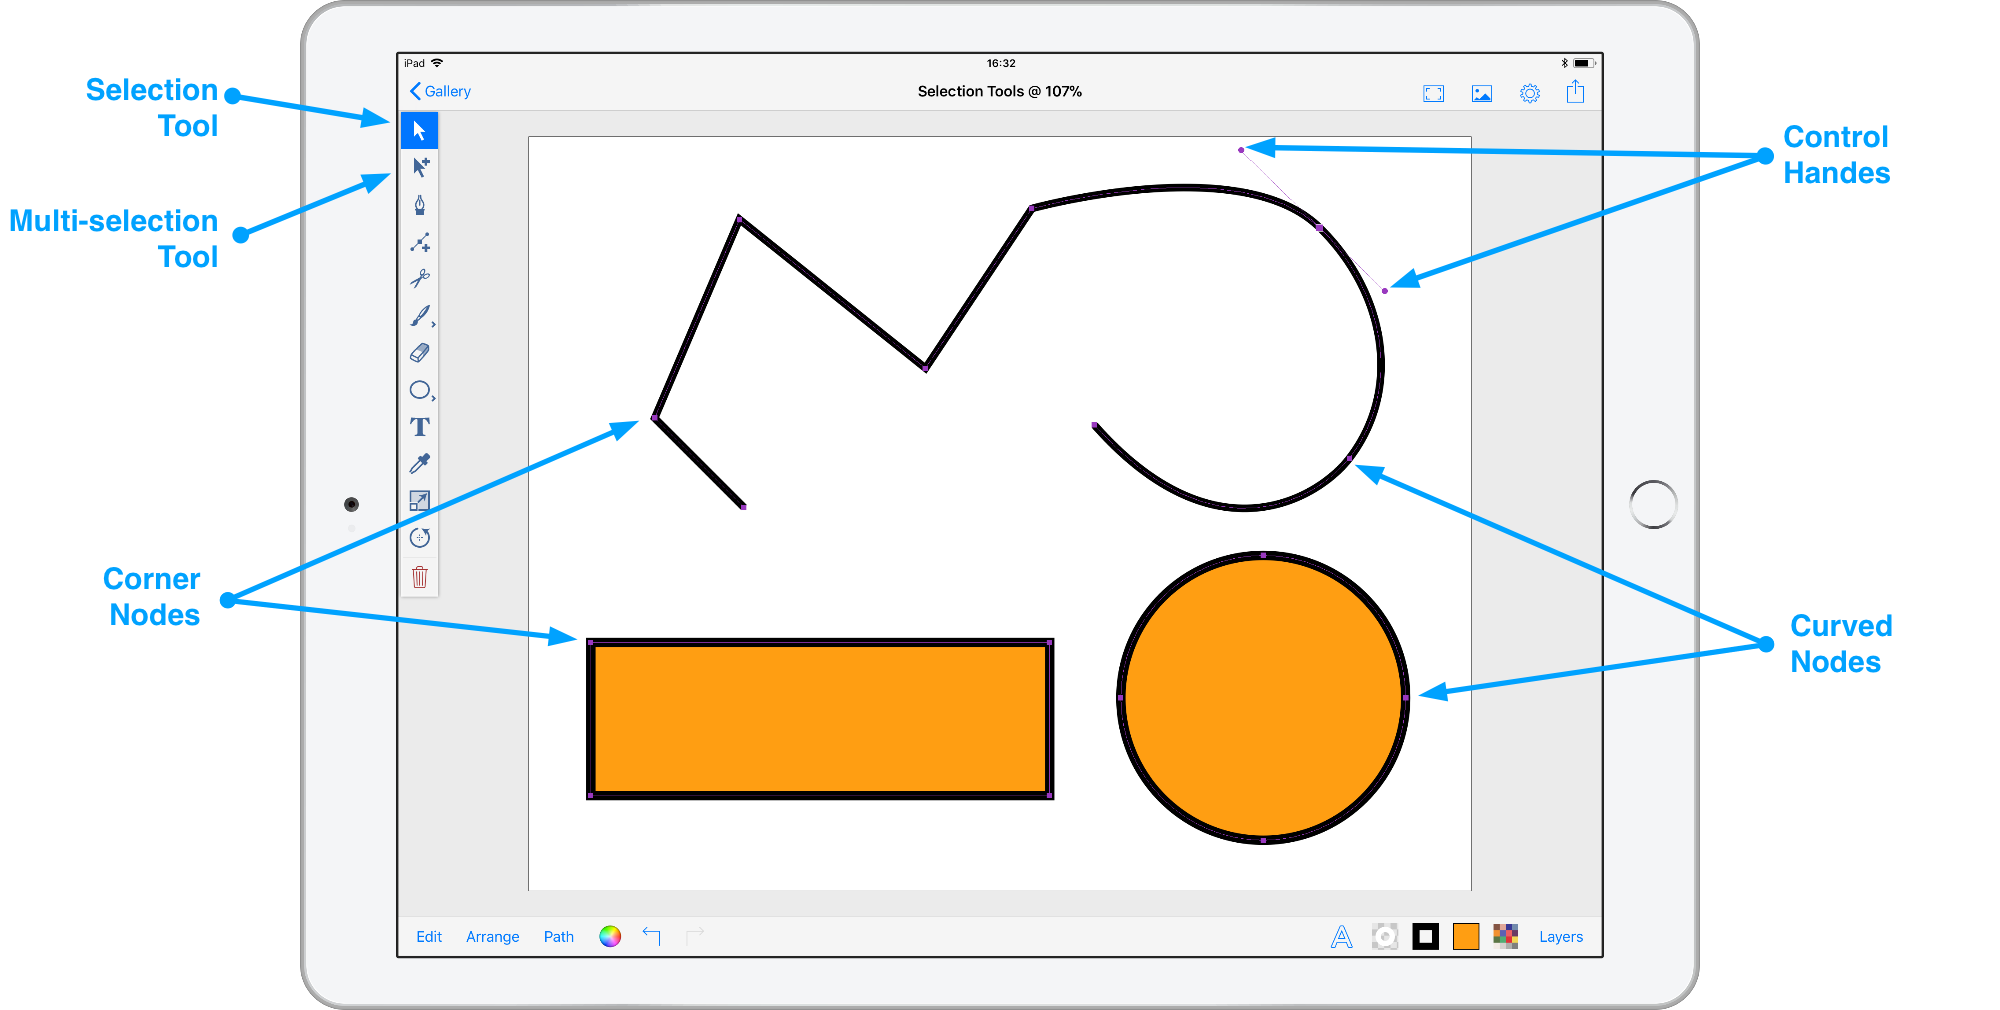
An overview of the selection tools available in Inkpad.
Vectors are made up of paths and anchors. An anchor is the point on a path where it changes direction. Anchors can be corners or curved and they are the way we edit paths to create shapes, and when a curved anchor is selected it’s control handles appear.
Selection Tools
There are two selection tools in Inkpad, these are both used to select paths and anchors. First we have the selection tool, this will select one path or anchor at at time, deselecting any previous objects when a new one is selected.
The multi-selection tool will continue to select multiple paths or anchors, until you click an empty space to deselect all selected objects. Multiple anchors can only be selected along the same path.
Tapping any anchor twice with either selection tool will change it between corner and curved.
Marquee Selection
Alternatively, select a group of objects by tapping an empty part of your drawing and dragging to enclose the objects, a box called a marquee will appear and all objects selected will be highlighted.
Moving Selected Elements
When one or multiple objects or anchors are selected you can drag them around your artwork. Holding down a second finger once you have started dragging will constrain the movement either horizontally, diagonally or vertically.
Editing Anchor Control Handles
The control handles on an anchor adjust the curve of the vector. Dragging the control handle further away increases the influence on the curve, closer decreases the influence. When you change the angle of one control handle the opposite one will remain parallel. Holding down a second finger while dragging the control handle will break the connection with the opposite one and allow them to be angled independently.
Double tapping a control handle will remove it and convert that side of the anchor from curved to corner.